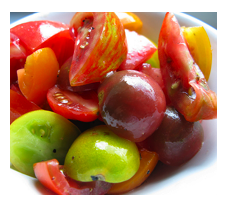
 Last year I bought a punnet of heirloom tomatoes from a local farmer’s market. It was a beautiful mix of green stripe, medium purple, small orange, red oxheart shaped tomatoes and some cherry toms. They were so good … that I thought I’d grow these tomatoes from seed myself! So I saved their seeds and this season I’m now just about to be rewarded with my own crop of heirloom or heritage tomatoes.
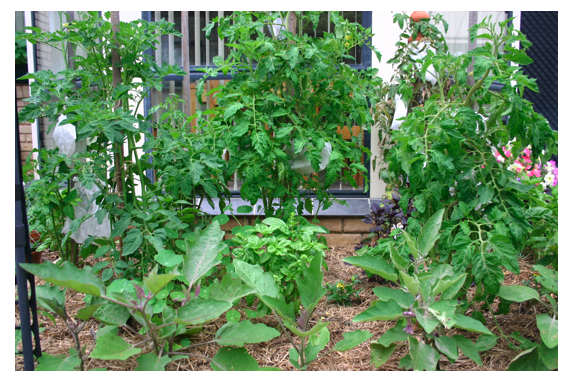
Here they are growing in my garden, just outside my kitchen and dining room. You’ll notice I’ve mixed them with some companion planting. Basil keeps the whitefly away and marigold helps to control the nematodes in the soil. Other plants in the tomato family are also planted, like the mini or lebanese eggplants in front and a few capsicum and chillies around the sides.
But let’s back-track a little first. They started from seed I collected from the punnet I bought at the markets. When you grow tomatoes from seed, you need to have the right seed to start with. Don’t use hybrid seed. Hybrid seed produces a mixed variety tomato, with the characteristics from 2 parent plants. When you collect seed from hybrid plants they often don’t come back ‘true to type’ and may revert back to the stronger parent plant. For instance you might have collected seed from a large red, disease resistant tomato last year, but this year the seed you collected and planted has produced a cherry tomato! Cherry tomatoes are more resilient and are used in hybridizing for their disease resistance and are often the dominant parent.
So choose open pollinated, non-hybrid seed instead. Heritage seed is great for this, because they come back true to type each year.
To collect the seed you need to scoop out the seed and rinse of as much pulp as you can. Put the seeds and pulp in a jar and fill it 2/3 full of water, then place some gauze over the top with a rubber band. Put the jar of seeds and water in a warm place to ferment for a week. By this time the pulp will come off the seed and float to the surface with any unviable seed. Skim off the stuff at the surface and then give the remaining seeds a good rinse using a sieve. Spread the seed on a clean plate and them to dry out completely for a couple of days. Once the seed is dry you can store them in an envelope for next season (don’t forget to date and label).
So this spring, using my cleaned and dried seed, I sowed them into a number of punnets (small rectangular pots) each with a different variety. I loosely filled the pots with seed raising mix to the top then firmed it down with another pot the same size, to get a uniform press (this is called tamping). By firming it down it leaves about 2 or 3 mm gap from the top. This is the ideal depth to sow your tomato seed. So I scattered the seed over the soil, only about 8 seeds per 6 x 12cm (2 1/2 x 5 inch) pot. Then I covered the seed with more seed raising mix and pressed to firm down again. The soil should be level with the top of the pot now. I watered it daily if needed and waited until the seed germinated in about two weeks.
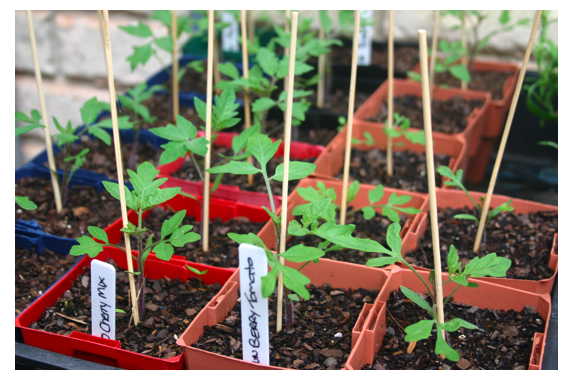
Allow the seedlings to develop a few leaves before potting on to bigger individual pots filled with a good organic potting mix. Then grow them on until they’re almost too big for the pots. By slightly constricting the roots in the pot (don’t overdo this otherwise your plant will be too stressed), it will force the plant to flower earlier so once you plant it into the garden your on your way.
Always plant your tomatoes with plenty of compost and manure and a handful of rockdust added to the garden bed beforehand to give good healthy growth. Don’t forget to stake the plants for support, especially if you have tall plants.
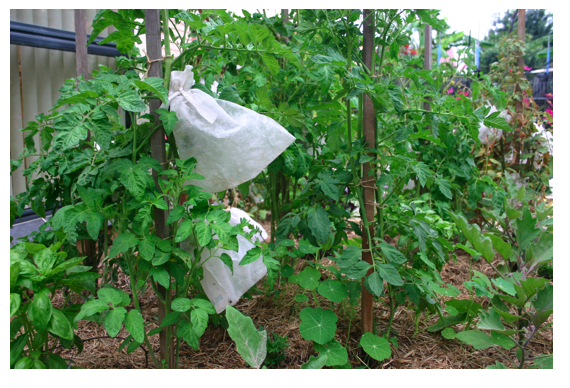
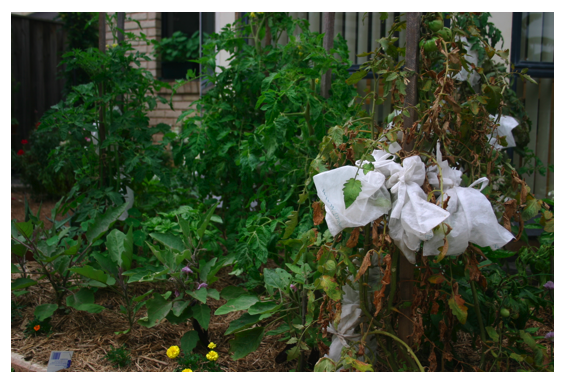
I use pest guard bags from Green Harvest to keep out birds, caterpillars and fruit fly. I just won’t grow tomatoes without them now, because I get perfect fruit every time.
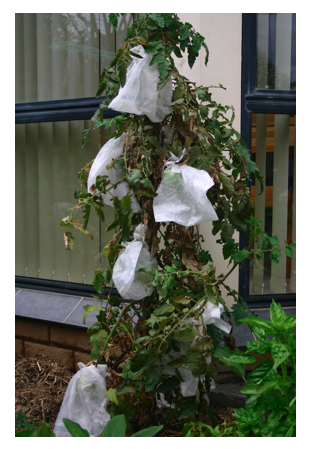
Incidentally, I planted 2 commercial hybrid tomato seedlings early in the season before I had sown my own heirloom seeds that I collected.
Have a look at the difference.
Both these plants have suffered badly from wilt whereas my heirloom or heritage tomatoes are growing vigorously. I’m still getting some fruit from the diseased plants so all is not lost. Crop rotation next year will help control this outbreak due to our long season of cool wet weather during spring this year.
My heirloom tomatoes aren’t quite ready for harvest yet but they’re looking pretty good already, each with a different shape to distinguish them apart.
I reckon they’ll taste every bit as good as the punnet I bought last year … if not … better!!
A great book on growing tomatoes is How to Grow Juicy Tasty Tomatoes.


 Twitter
 Facebook
I’ve just picked my first heritage tomato for the season today. Beautiful golden yellow medium sized sweet tomato! Yah.
A round of applause for your article post.Much thanks again.
Thanks for the input.Let me say that all hybrids are not deterimate; many if not most of them are indeterminate. Look at Sungold, for example, a hybrid that supposedly produced 65ft indeterminate vines.Also, cardboard egg cartons can be a pain to use because the roots may actually grow through the paper, but when planted in a bigger pot, the paper will not biodegrade fast enough to let the roots continue to grow underground. Thus, you would have to remove the seedlings from the cardboard trays, and tear a lot of roots in the process. Otherwise, your seedlings would get terribly root-bound and stunt the plant.I would not start seeds outdoors without a heated greenhouse because I start them in mid-winter when temps are way too cold for tomatoes. Hardening off isn’t a problem for me; it takes 1 to 2 weeks and then the plants are ready for the real world.
I had no need to save seeds or plany bought seedlings – I have a veritable forest of Tomato plants in my small side garden that have grown from my emptying my worm farm castings into the soil !!
I’m thinking of making Green Tomato Relish or Chutney as there are so many!!!!
Heaven help me next year ,as there will be many that I will miss and the seeds will fall……..!